Adjust photography settings
Before you take a photo, you can adjust settings to get the best photo for your situation.
Use a timer
- If you're taking a selfie, touch
 .
. - Touch
 and choose 3s or 10s.
 - Frame your shot. When you're ready, touch
 to start the countdown.
 - Take your place in the shot (if you're taking a selfie, simply wait) and smile!
Use a flash
To set the flash mode (off, always on or auto), touch ![]() on the viewfinder.
on the viewfinder.
Use HDR in high-contrast lighting
Taking a photo of a bright scene that also includes dark shadows? Use HDR (High Dynamic Range) mode. The camera captures multiple exposure levels and combines them into a single photo for vibrant colours and more detail in both light and dark areas.
To set HDR mode (off, always on or auto mode), touch ![]() on the viewfinder.
on the viewfinder.
HDR is best for:
- Landscapes with bright sky and shaded hills or foliage
- Outdoor portraits with lots of contrast
- Backlit scenes with dark shadows and streams of sunlight
- When both the camera and subject are stationary
Do not use HDR for:
- Action shots
- Low-light indoor photos
- When you want to use the flash or the front camera
When the camera detects a high-contrast scene, it automatically goes into HDR mode and HDR appears in the viewfinder. Consider whether HDR mode would improve the photo or not.
Use beauty filter
Your front (selfie) camera includes a beautification filter. Use it to:
- Soften and even skin tone
- Remove blemishes and shine
- Whiten teeth
- Highlight T-zone
- Slenderise face
- Enlarge and brighten eyes
To use the filter:
- Make sure you're using the front camera. (Touch if needed.)
Do one of the following:
- Touch
 to use automatic mode.
 Touch
 to use manual mode, then adjust the intensity of the filter:
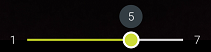
- Touch
- Smile and touch to take the picture.
To turn the filter off, touch ![]() or
or ![]() and change to
and change to ![]() .
.
Adjust ISO and exposure
To refine settings before taking a photo:
- On the viewfinder, touch
 > Professional mode.
 Do one of the following:
To adjust all settings, touch
 and drag an icon to adjust its setting.
To adjust an individual setting, touch its icon.

Manual focus 
White balance 
Shutter speed 
ISO, the camera's sensitivity to light 
Exposure
Do any of the following:
- To return to default settings, touch
 .
. - To close settings, touch
 .
. - To exit Professional mode and return to normal mode, touch
 > Photo.
- To return to default settings, touch
Adjust photo size
Lower-resolution photos and videos take up less space, but have lower image quality.
- On the viewfinder, touch
 Settings.
 - Touch Photo size for the front or rear camera.
Select size to use for new photos:
- To display pictures that fill your HDTV or widescreen monitor without cropping, use 16:9 widescreen mode.
- To print 5"x7" or 8"x10" photos, use 4:3 standard mode.
- In general, use smaller file sizes (MP) for photos that you'll share; use larger sizes for photos that you'll print or edit.
Fix a problem
If you’re having problems, try these troubleshooting steps.